The Raspberry Pi AI HAT+ brings powerful AI processing to the Raspberry Pi 5, revolutionizing how we approach projects like computer vision, robotics, and home automation. Featuring the Hailo AI accelerator chip, the Raspberry Pi AI HAT+ connects through the PCIe Gen 3 interface for ultra-fast data transfers, enabling seamless AI integration on the Raspberry Pi. Available in two variants—13 TOPS for moderate workloads and 26 TOPS for demanding, real-time applications—the AI HAT+ enables tasks like object detection, pose estimation, and segmentation with remarkable efficiency.
Ideal for applications in computer vision, home automation, security, and robotics, the AI HAT+ leverages the Hailo-8L and Hailo-8 accelerators to support single or multiple neural networks.
The AI HAT+ is easy to install, compatible with the Raspberry Pi Active Cooler, and comes with long-term production support until at least January 2030. Priced at $70 (13 TOPS) and $110 (26 TOPS), it provides an accessible, powerful solution for integrating AI into Raspberry Pi projects, making it an indispensable tool for hobbyists and professionals alike.
Yesterday, I received the 26 TOPS Raspberry Pi AI HAT+, and I couldn’t wait to unbox it. Here’s a quick look at what came in the package: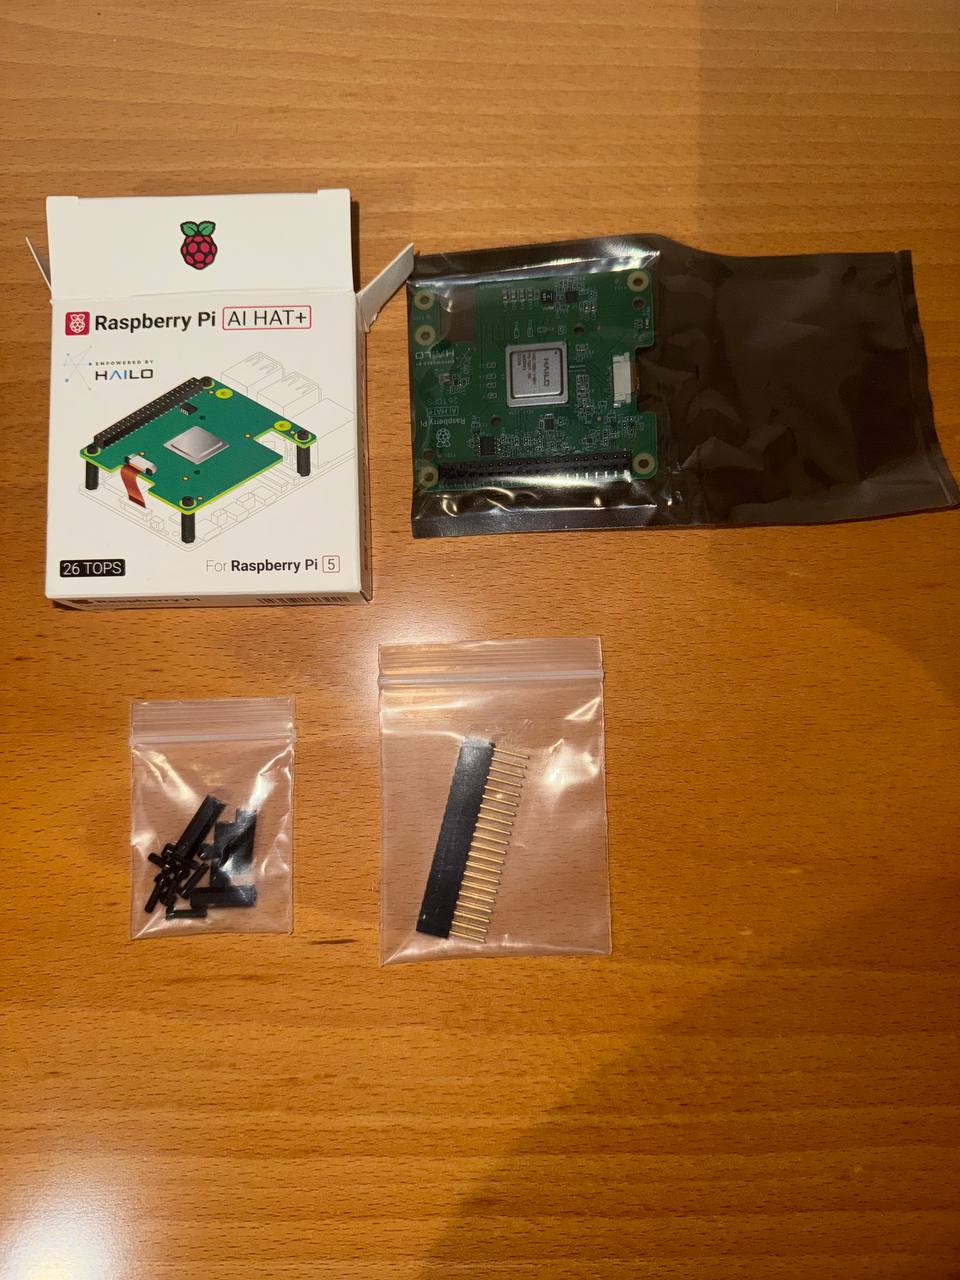
It includes most importantly the AI HAT+ as well as all the needed hardware: 8 screws, 4 spacers, and a 16-mm high, 40-pin male to female header, which extends the GPIO pins of the Raspberry Pi and enables fitting the AI HAT+ on a Raspberry Pi 5.
Key Features of the AI HAT+
- Powerful AI Processing
The Hailo accelerator provides significant processing power while maintaining energy efficiency. The 26 TOPS model supports simultaneous neural networks at high frame rates, enabling advanced real-time AI applications. - Seamless Integration
Built specifically for the Raspberry Pi 5, the AI HAT+ simplifies setup with its direct integration onto the PCIe interface. It works harmoniously with existing Raspberry Pi software, including camera applications, ensuring hassle-free operation. - Thermal Management
Engineered for effective heat dissipation, ensuring stable AI performance even during demanding workloads. For maximum efficiency, pairing it with the Raspberry Pi Active Cooler is recommended. - Wide Compatibility
Compatible with a range of AI tasks, from object detection to semantic segmentation, the AI HAT+ supports flexibility across projects. Models built for the Hailo-8L will also function seamlessly on the Hailo-8, providing developers with versatility.
Getting Started with the AI HAT+
Here’s a quick guide to installing and using the AI HAT+:
- Update Your Raspberry Pi
Ensure your Raspberry Pi 5 runs the latest software with:sudo apt update && sudo apt full-upgrade - Check Firmware
Verify firmware is up-to-date:sudo rpi-eeprom-update
If the firmware predates December 6, 2023, update it through the Raspberry Pi Configuration CLI. - Change the bootloader to the latest version:
sudo raspi-config
and then follow the steps from the screenshots


make sure not to reboot yet. - Run the following command to update your firmware to the latest version:
sudo rpi-eeprom-update -a - And now power off your Raspberry Pi 5 before the installation of the AI HAT+ accelerator:
sudo init 0 - Disconnect the Raspberry Pi from power before beginning installation and install an Active Cooler if it is not installed yet.
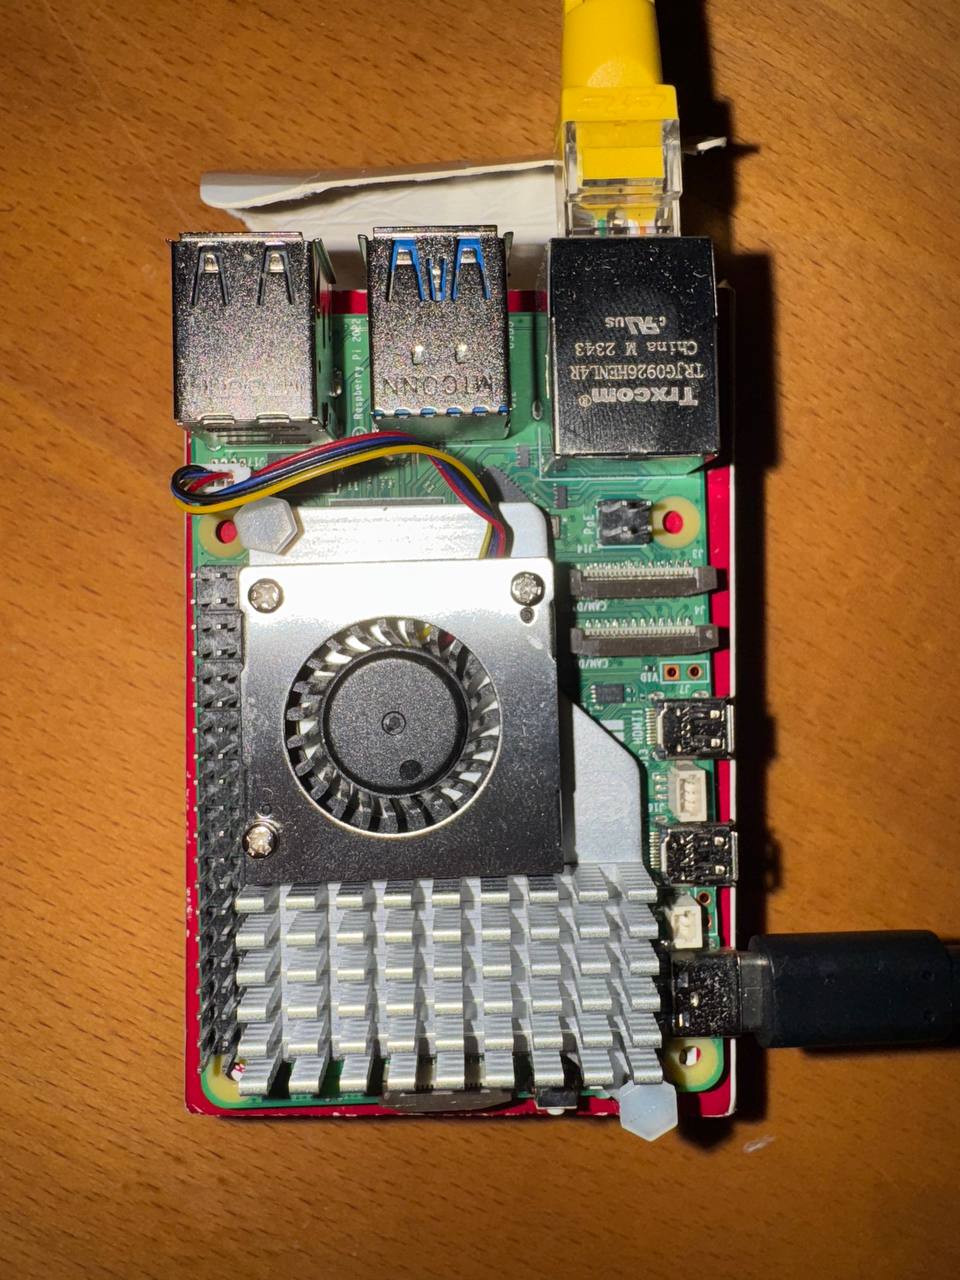
- Install the spacers using four of the provided screws. Firmly press the GPIO stacking header on top of the Raspberry Pi GPIO pins. Disconnect the glued side the ribbon cable from the AI HAT+.
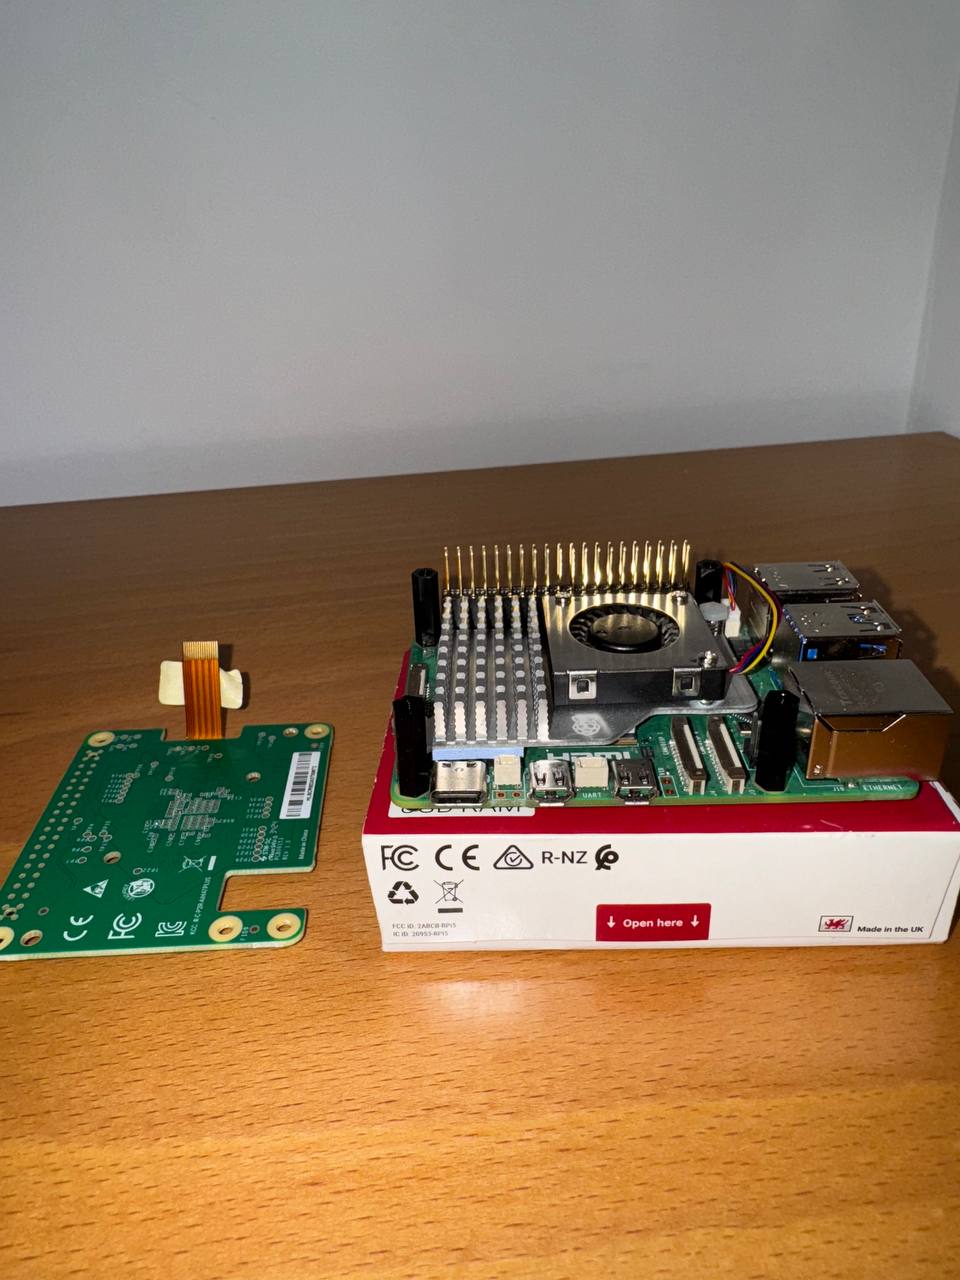
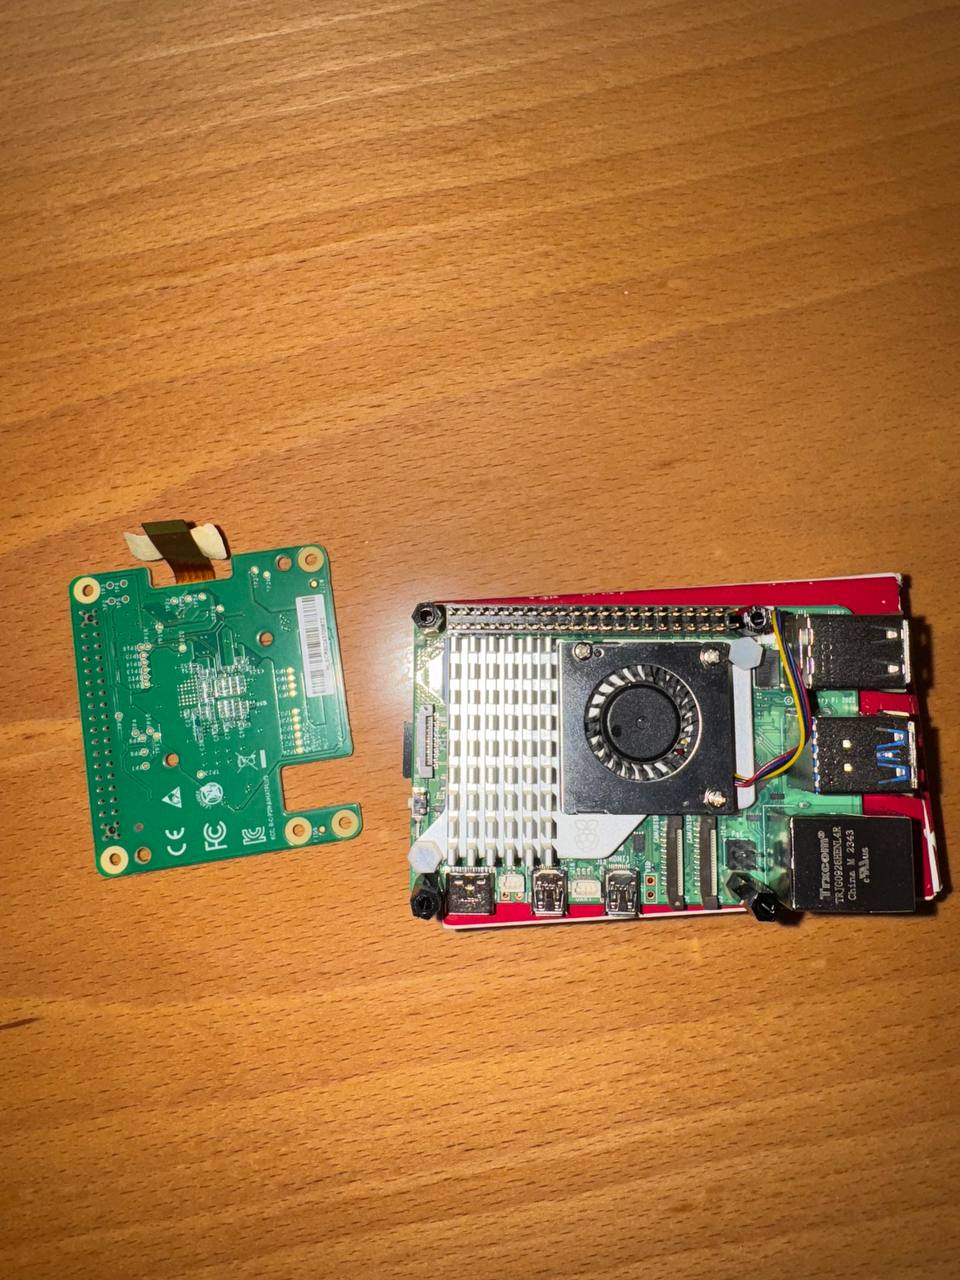
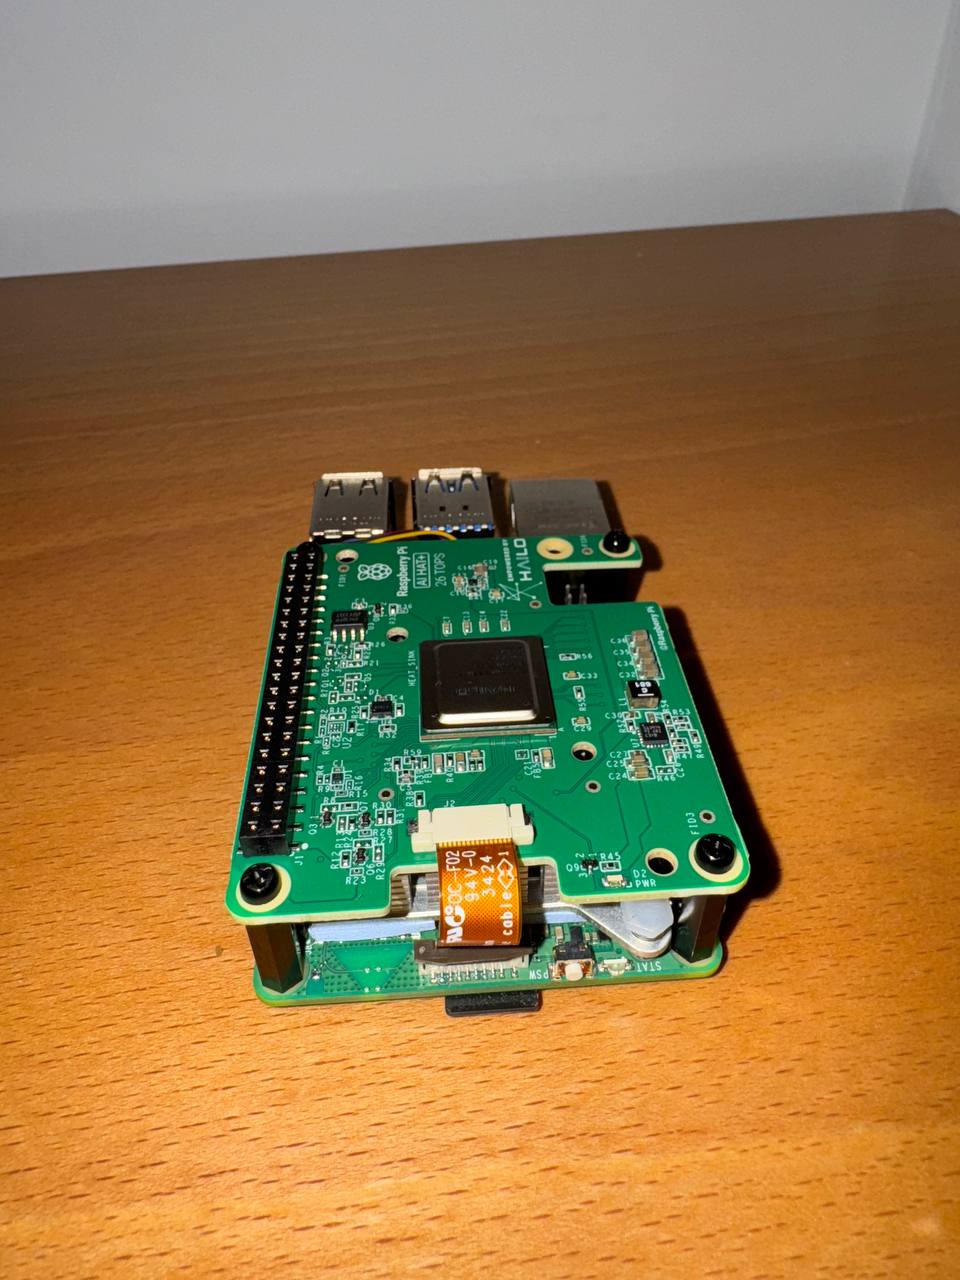
- Insert the disconnected end of the ribbon cable into the PCIe port of your Raspberry Pi. Lift the ribbon cable holder from both sides, then insert the cable with the copper contact points facing inward, towards the USB ports. With the ribbon cable fully and evenly inserted into the PCIe port, push the cable holder down from both sides to secure the ribbon cable firmly in place.
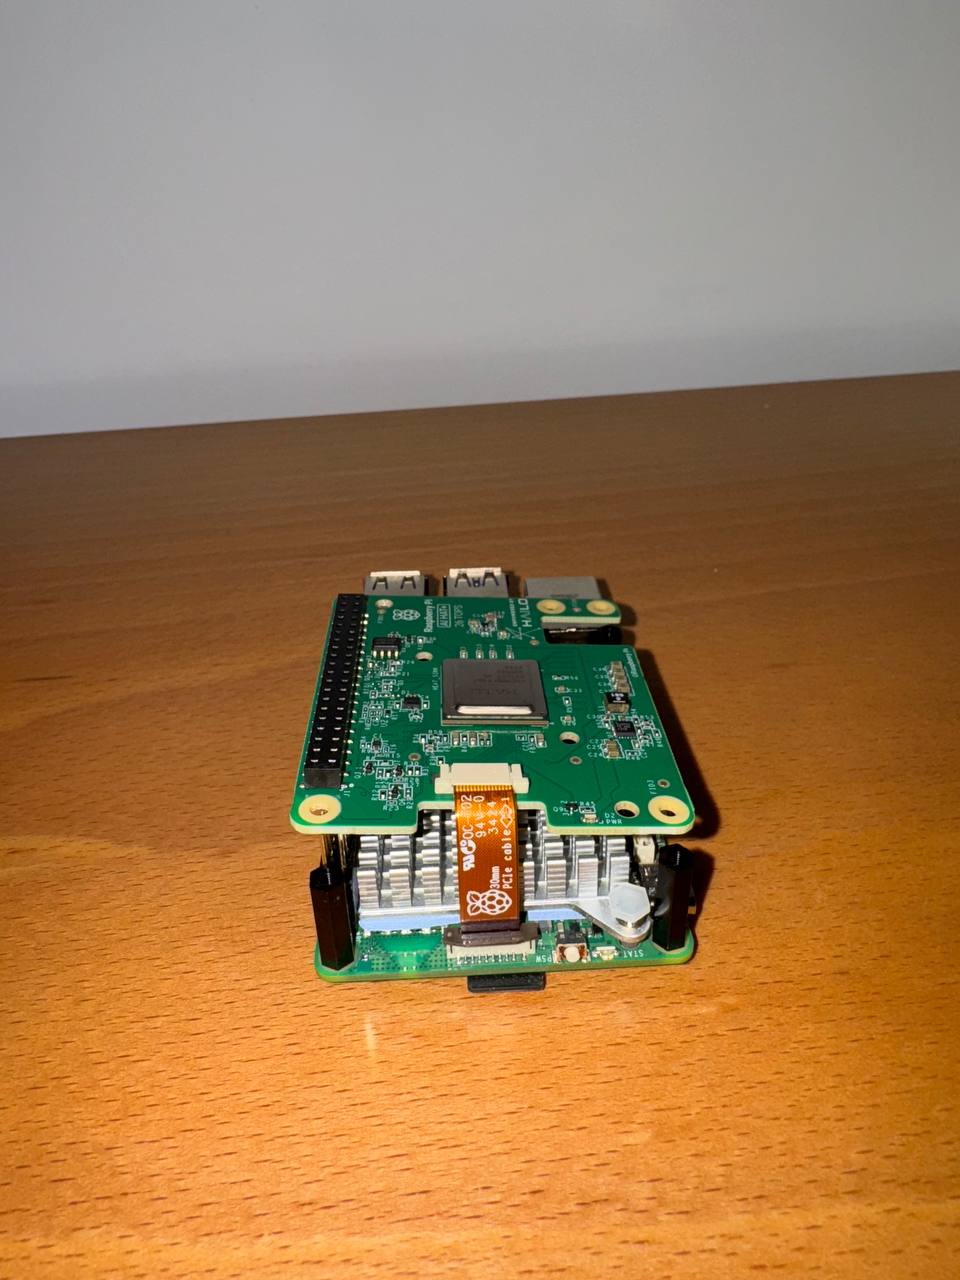
- Set the AI HAT+ on top of the spacers, and use the four remaining screws to secure it in place.
- Congratulations, you have successfully installed the AI HAT+. Connect your Raspberry Pi to power and enable PCIe Gen 3.0 speeds:
sudo raspi-config
SelectAdvanced Options> SelectPCIe Speed> ChooseYesto enable PCIe Gen 3 mode > SelectFinishto exit.sudo reboot - Install the dependencies required to use the NPU:
sudo apt install hailo-allsudo reboot - To ensure everything is running correctly, run the following command:
hailortcli fw-control identify
Note: If you encounter issues where the board doesn’t display a serial number, port number, or product name like on the screenshot below, don’t worry! This has been reported on the Raspberry Pi forums, and we’re monitoring the situation closely.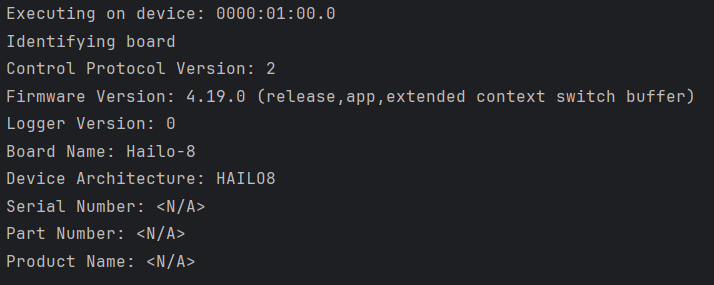
UPDATE: According to documentation on GitHub,
AI HAT+ devices may show <N/A> for Serial Number, Part Number and Product Name. This is expected, and does not impact functionality.
In order to check that the firmware loaded successfully, you can rundmesg | grep -i hailo
the output should look like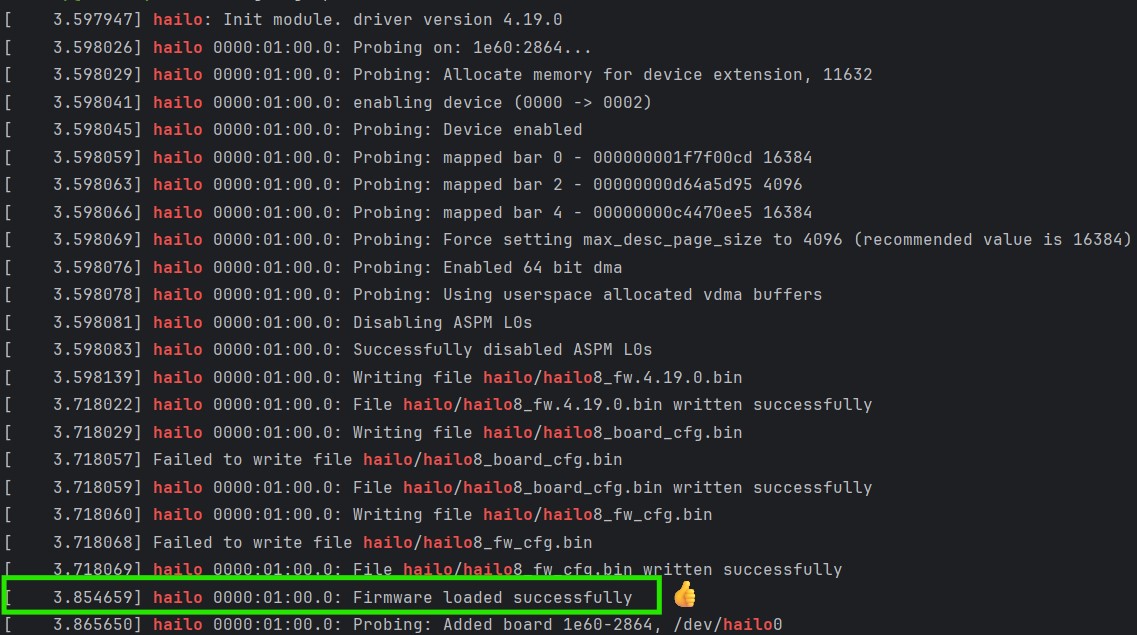
What’s Next?
Stay tuned for our upcoming blog posts where we’ll:
- Deploy Machine Learning and Computer Vision Models on Raspberry Pi: Test various ML models on your Raspberry Pi 5 with the AI HAT+ to evaluate performance.
- Troubleshoot Potential Issues: Investigate whether the current firmware issue is a minor bug or a more significant problem.
- Optimize Your Setup: Share tips and tricks to get the most out of your Raspberry Pi and AI HAT+ combination.
Embark on your AI journey with Raspberry Pi 5 and the AI HAT+ accelerator. Happy tinkering!
References:
https://www.raspberrypi.com/documentation/accessories/ai-hat-plus.html